Research
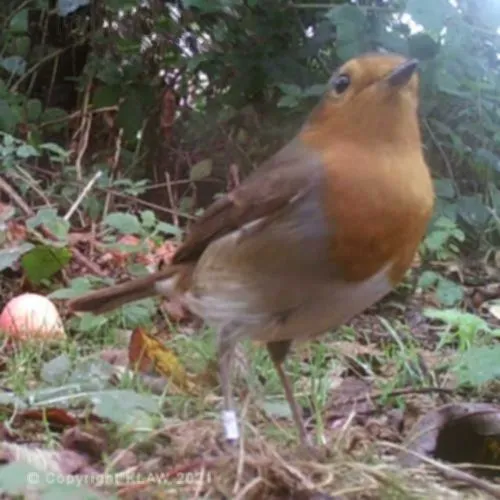
Most landholder members are involved in some aspect of research, such as recording species, particularly those that are in danger of extinction. This can be a direct contribution or via groups of people hosted by a landholder. Contributions made to British Trust for Ornithology, RSPB, surveys on bats, butterflies, moths and grasshoppers are just a few of the many.
Apps for Identification
Useful Natural History Apps: Briefing Note Produced for KLAW Members by KLAW members.
Although many fantastic ID guides exist on the wildlife of the UK, you don't always have your copy of 'The dragonflies of Sussex and Kent' on you when you most need it! Maybe because of this, apps are becoming a popular way of not only identifying species but also recording them. However, it's not always easy to know which apps to use, and importantly where any records might go. Some KLAW members have been looking into this and provided useful briefings on their experience of using different apps. Many thanks for Sally Edge for providing the first two useful summaries.
Please email the KLAW Chair using this email address: chair@KLAWonline.co.uk if you are able to contribute to this briefing on Apps. For example, if you have used an identification app yourself and have views on the pros and cons.
The KLAW committee have also consulted Tony Witts of the Kent and Medway Biological Records Centre, and had the following useful feedback.
A note from Tony Witts of Kent and Medway Biological Records Centre:
"I would strongly recommend using UK based apps since we have highly developed networks for sharing data that academic institutions don't have as data is often held closely for their own research and funding opportunities."
Useful Links:
For the 'Langdon Garden' project on the iNaturalist website Blog comparing iNaturalist and iRecord click here.
Where To Send Your Wildlife Records? - James Common's site, click here.
App Reviews
iNaturalist
iNaturalist is an online social network of people sharing biodiversity information to help each other learn about nature." Originally founded in the US, it is now a global non-profit, with localised partnerships – in the UK this includes the Biological Records Centre and the National Biodiversity Network Trust. This means that data generated in the app is fed into our local Kent and Medway Biological Records Centre. Tony Witt of KMBRC has confirmed that iNaturalist is one of three apps (along with iRecord and BTO Birdtrack) that have good data flows and solid verification and validation procedures that assure data users such as KMBRC of the quality of the data.
KLAW and Apps – By Amanda Brookman
I have to agree with James Common, I find iRecord very useful. When I first started attending various wildlife events there was a lot of encouragement for people to record what they saw and iRecord was always the platform recommended. The phone app is very handy for in the field records and the PC based version great for when you're back at home and have records to submit after you've identified what you've seen. Its also great for checking your submitted records.
There are also certain groups which have templates for recording that capture info that iRecord doesn't automatically, such as if you are moth trapping, you select that species list and you will be asked for the kind of trap you have used and enter your data as a list.
There is also specific iRecord app for butterflies, unsurprisingly called iRecord Butterflies, which you can also tweak to include day flying moths. This is a great resource because it includes an ID guide and can be used to record one off sightings or multiple species in a survey area.
There's also iRecord Grasshoppers, another fabulous app which includes ID help including the sounds of grasshoppers/ crickets and allows you to record them and upload them with your submission to aid verification.
The Kent Moth Group are exceptionally speedy at verifying records and I have found that hoverfly, ladybird, dragonfly and shieldbug records are also usually verified quite quickly too.
Some groups I have found get better verification if submitted through a recognised scheme e.g. BeeWalks, UKBMS or the Garden Butterfly Survey. There is some frustration within the general public that some records don't seem to get verified, but this doesn't stop me submitting what I can, you never know when a record may be needed and if we don't know about something we can't protect it.
My experience of using iNaturalist – By Sally Edge
From a personal point of view, I have been using the iNaturalist app on my phone for some months and have found it to be very user friendly. I mostly use it to record species that I have been able to photograph (so mostly invertebrates, plants and fungi, rather than birds, mammals or amphibians). I can then view these records in various formats – grid, list, and map. I can also use the map to see other user's records in my area. Identifications can be verified by other users, and can turn observations from 'casual grade' to 'research grade'. Most of my observations have been verified as research grade. The casual grade ones have not been verified by other users yet, or my image isn't good enough for a definite ID. You can also use the app as an identification tool (it will look at your image and make suggestions), but I tend to cross-reference with the iPhone ID tool and internet research before making my record. Records can also include sound recordings so could be used for bird song, for example. I have recently used the 'Project' function for my garden called 'Langdon Garden'. This means that anything recorded in the garden, by any user, is listed under the Langdon project. I will encourage visitors to our events to use it, and it may be useful in future if we run BioBlitz type activities.
iNaturalist and KLAW
If other KLAW members created similar projects for their areas of land, we would be able to follow and discuss each other's observations. Potentially, this could be a great way to build the KLAW community, share information about wildlife on our land, and find common interests/potential projects.
Merlin
Merlin is a bird ID app – described by its makers as 'a birding coach for bird watchers of every level'. It is created by Cornell University in the United States, and draws on data fed into the recording app eBird, including photos, recordings, and data about when and where observations were made. This user-generated data enables the Merlin AI to identify a bird in real time, quickly and easily. When installing the app you can choose your country location ensuring that the correct data set for your region is installed. It is primarily an 'identification app', rather than a 'recording app' so not one for sharing bird sightings with UK-based recording centres.
My experience of using Merlin – By Sally Edge
I have found Merlin to be a very enjoyable and rewarding app to use. As a beginner birder it has been great fun being able to use the app to identify the birds singing around me in real time. The app will highlight the names as each bird sings, so if a bird is repeating a call, you have a chance to listen multiple times and begin to recognise the sound by yourself. My impression is that the majority of identifications are correct – only once or twice have I been aware of a mix up (e.g. between a moorhen and a coot). The app also identifies from photos – even blurry ones – with accuracy, and makes suggestions from a description if you don't have a photo or sound. Highly recommended for both beginner and more experienced bird watchers.
eBird
ebird shares records with the Kent Ornithological Soc. but the licence prevents them from sharing the records further, this is an issue that the wider local records community has looked into but not come up with a solution.
The 'What's Flying Tonight?'
One member has found this to be a great way to identify moth species that might be visiting your garden. You enter your postcode and the app pulls data from local moth records, displaying nearby species.
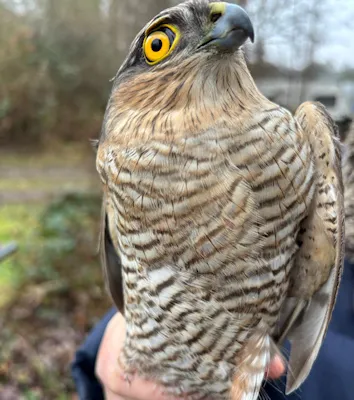
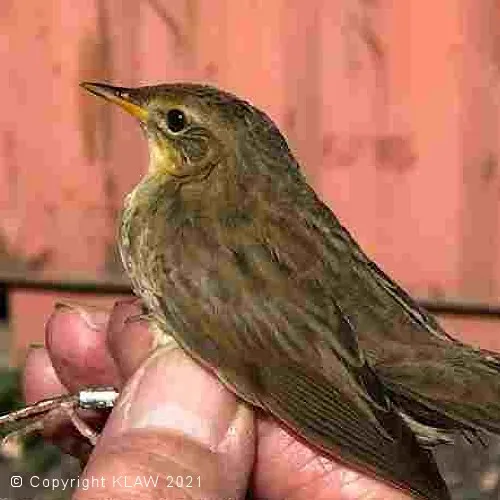
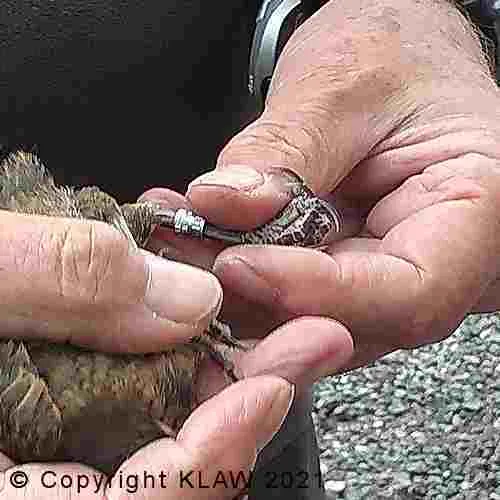
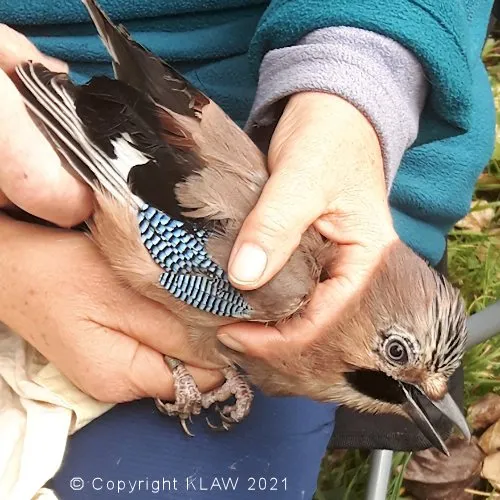
Bird Ringing
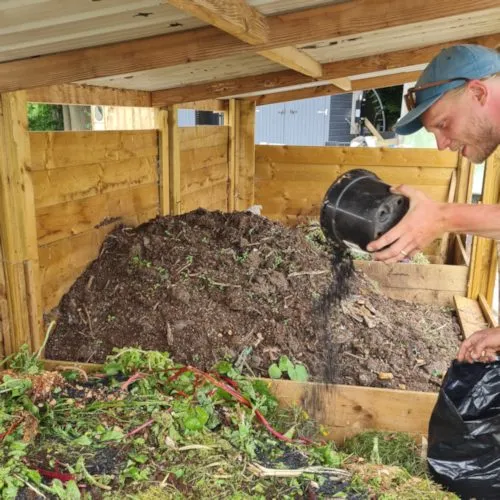
One area of research is the bird ringing at several KLAW Member sites. For example, a team of experts has been ringing birds for several years at Mystole Orchard, which is a BTO Constant Effort Site (CES). This study is monitoring how bird populations are changing by ringing at fixed intervals and at the same locations. The data collected from both Mystole and other sites is sent to the BTO. These ringing records cover a range of species, with the sex, age and weight of each bird ringed. The details of where birds were previously ringed are recorded if recaught.
Details of the training essential for safe bird ringing is available by clicking here to go to the BTO web site. This also provides guidance on ringing, the reasons for it and how to get involved.
There are several ringing trainers and groups in Kent, also two Bird Observatories, Sandwich Bay and Dungeness, where people can go to see ringing being done and perhaps to get involved and train if they wish. Always remember that whilst ringing birds is a privilege and very enjoyable, it is a licensed activity and requires quite a commitment to train.
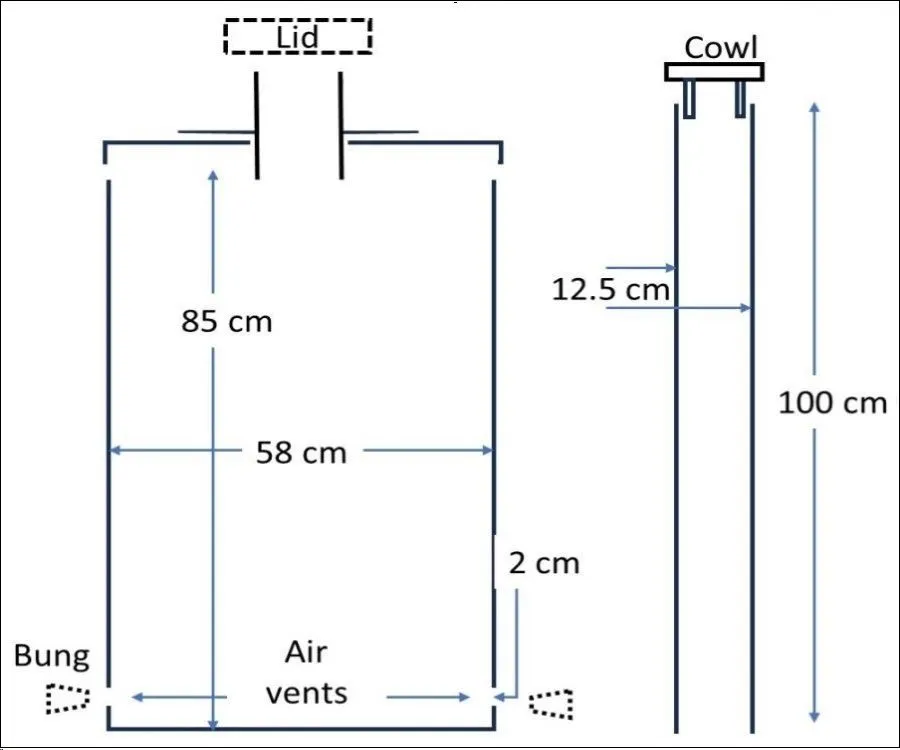
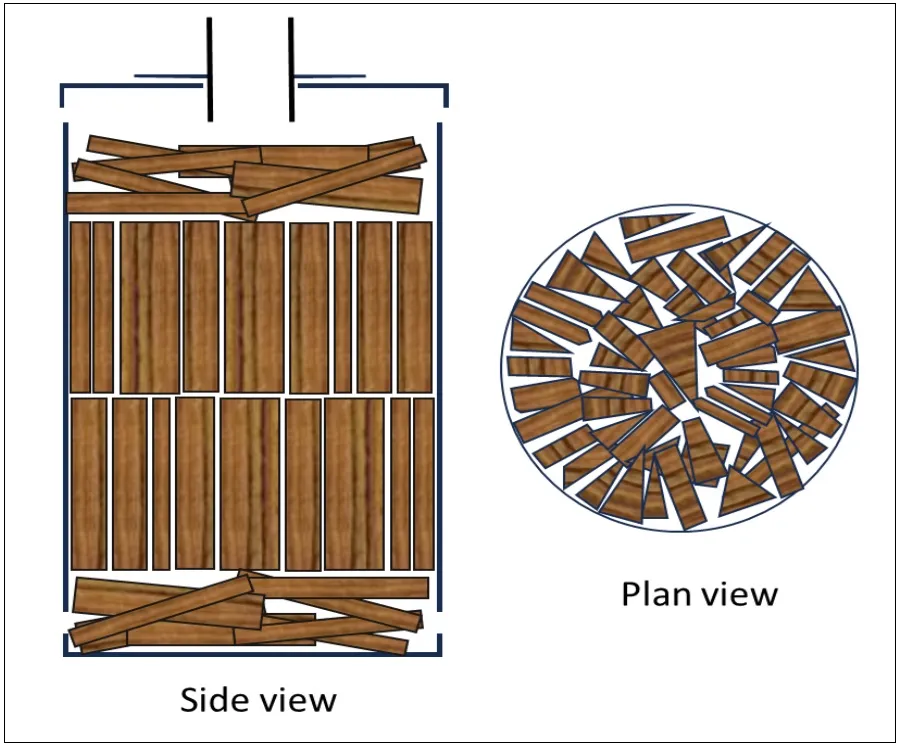
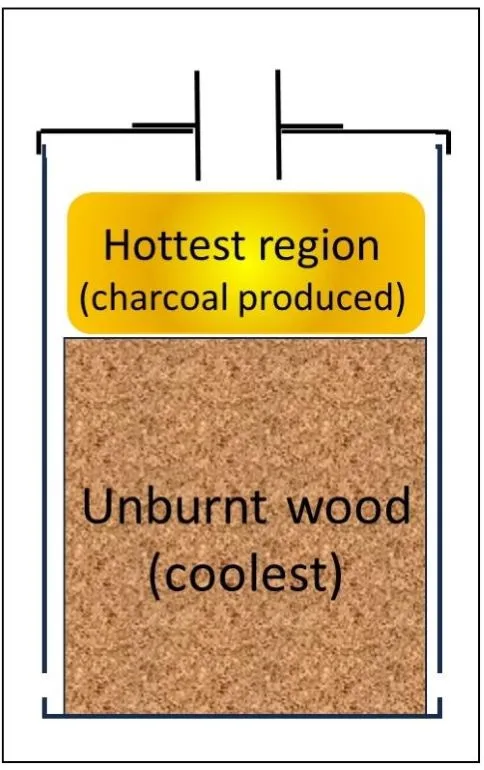
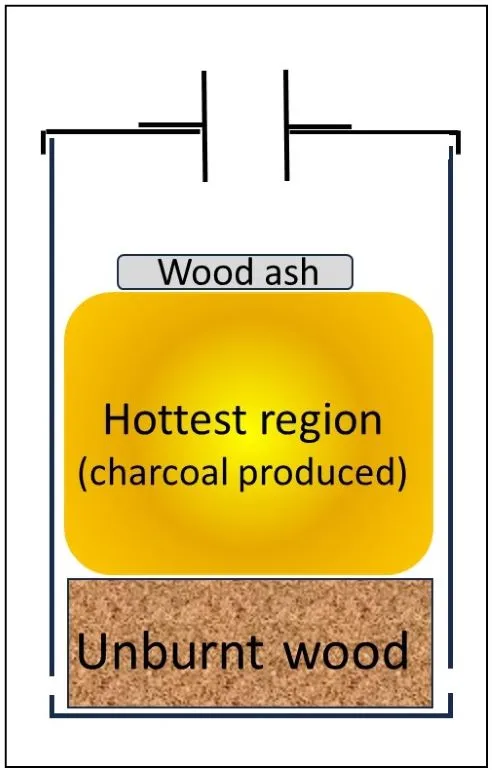
Moths and Moth Trapping: A Quick(ish) Guide
Rory Harding, Kent Wildlife Trust
For more information on KWT and moths click here.
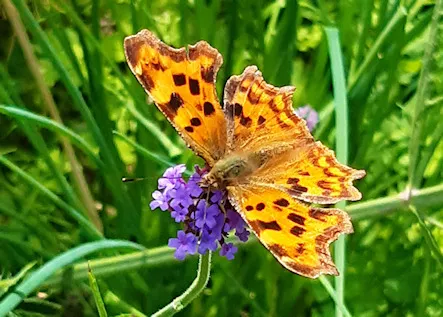
Comma Moth
Moths are a vital part of our ecosystem, here in the UK they perform pollinator services as important as that of bees. New research shows moths are more efficient pollinators than bees. Click here to find out more.
Moths are also a vital part of the food chain. At the larval stage they feed on a huge variety of plants, these caterpillars provide food for predatory insects and birds. Those surviving to pupate into moths, are again a vital source of food for bats and insectivorous birds.
They are also underestimated in their beauty, which comes both from their variety, fantastical names and for many, their incredible pattern and colour. Once the world of moths is discovered you won't think about them the same way again!
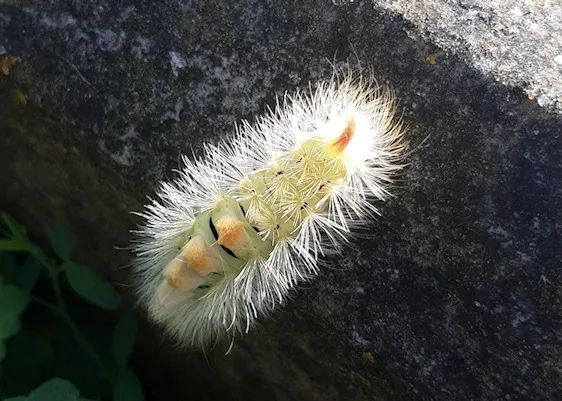
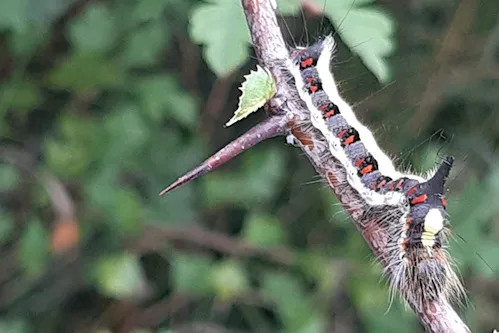
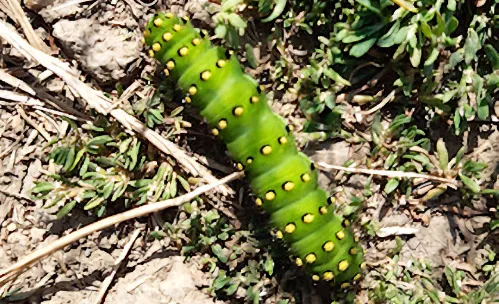
Sycamore Moth Caterpillar
Mothy facts
- There are over 2,500 species of moth in the UK, compared to just 59 species of butterfly.
- Moths have decreased by 28% since 1960's, although this is more like 40% in Southern Britain.
What is the difference between a moth and a butterfly?
Moths generally hold their wings horizontally at rest compared to butterflies, (although there are exceptions to this). Moths tend to have feathery antennae compared to clubbed antennae of most butterflies, but again there are some exceptions. There are some day flying moths, but most tend to be nocturnal in habit. Moths and butterflies all belong to the group Lepidoptera. More information here.
Managing land for moths
Moths love a combination of safe places to shelter and a food nearby, so creating a moth- friendly garden or larger land holding, is all about planting or encouraging a mixture of caterpillar foodplants, nectar-rich plants and shrubs or trees.
In terms of shelter in a garden its recommended to delay cutting back old plants or grass in autumn, or leave some areaa uncut all winter and also leave some piles of fallen leaves as shelter. For larger land areas managed for nature, leave some areas of long grass all winter (cutting in spring) even if you mow most of your meadow areas in autumn. Diversity of sward height and diversity of grass species are both key. Different grass species are really popular food plants for a mixture of moth larva.
No matter the size of your garden or land, reducing or stopping use of pesticides and herbicides is important, as these can harm moths, caterpillars and the plants on which they feed.
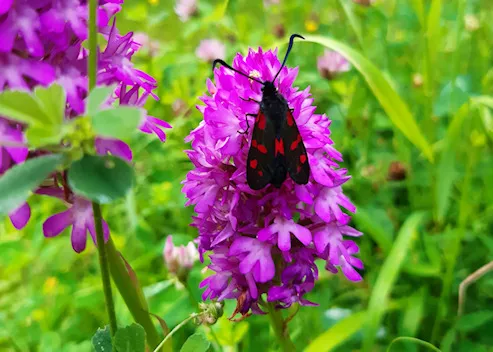
Six Spot Burnet
Lighting
Nocturnal insects, including many moths navigate in part by natural light sources, such as the moon. They can become disorientated by artificial light, wasting energy, increasing the risk of predation and reducing their efficiency as nocturnal pollinators. The type (wavelength) of light seems to affect species differently. For instance, LEDs seem to attract more moths and flies, but fewer beetles, than sodium lamps. LEDs with cool white light (blue end of the spectrum) attract more insects than warm white LEDS. As a general rule insects are more sensitive or attracted to short-wavelength (UV, blue and green) than long-wavelength (orange, red and infra-red) light.
Lighting can impact many species, not just moths
- The breeding success of glow worms is adversely affected by artificial lighting
- Bats show disrupted feeding patterns in lit areas
- Robins extend their activity period in artificial light, singing in the middle of the night, which impacts their energy use can make them more prone to cold and disease
- Moths and nocturnal-flying migrating birds can be disorientated by light sources and urban areas
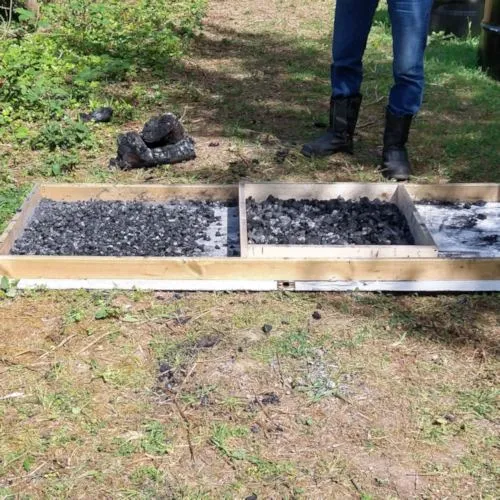
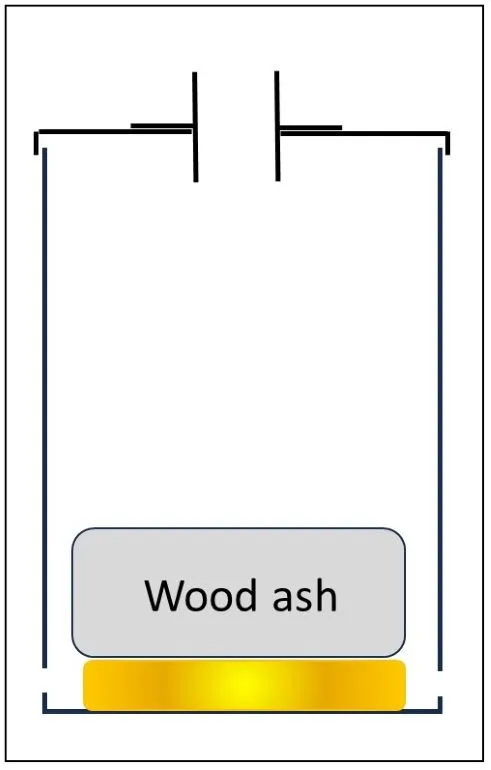
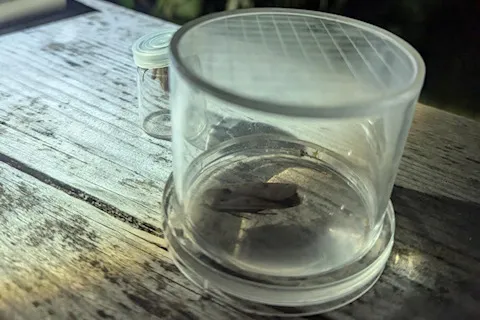
Moth Trapping
Mothing, as it's fondly known in the business, is a non-harmful method of catching moths alive, in order to identify and record the number and species. Moths will come towards light, and non-lethal moth traps are designed to draw them in, where they become disorientated, and settle. This is normally on egg boxes, overnight, so that they are ready to be identified and counted in the morning.
Precisely because you are luring a moth away from it's important role of flying around to pollinate and mate, it's important not to trap too frequently, once a month being a useful standard. This allows the building of a picture of what is there across the year and then for comparison of year to year.
Choosing a warm night, with little moonlight is preferable and choosing a location without other competing sources of light is also better. Moth trapping when there is a clear sky and full moon will often yield fewer moths coming to the trap.
To maximise the benefit of trapping, records should be submitted to iRecord or direct to Kent and Medway Biological Records Centre, so the data can be available for other ecologists and future ecologists to review and used to analyse distribution patterns and population changes over time.
Expert moth-ers will often stay with the trap into the evening, butterfly net in hand, to collect moths as they approach the trap (as not all will end up inside). These can then be identified on the spot, although the majority will be left to discover in the trap in the morning.
When starting out, it's easier to begin with macro (larger) moths, and move to micro moths once you are more confident in your identification skills.
More on trapping: The NHBS Guide to Moth Trapping.
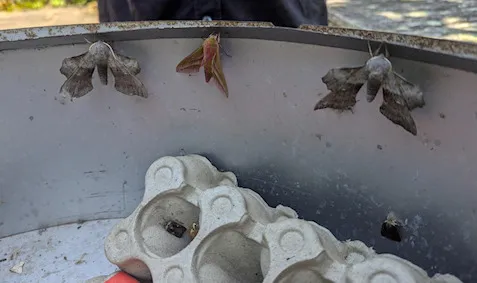
Two Poplar Hawkmoths and an Elephant Hawkmoth
Large Yellow Underwing
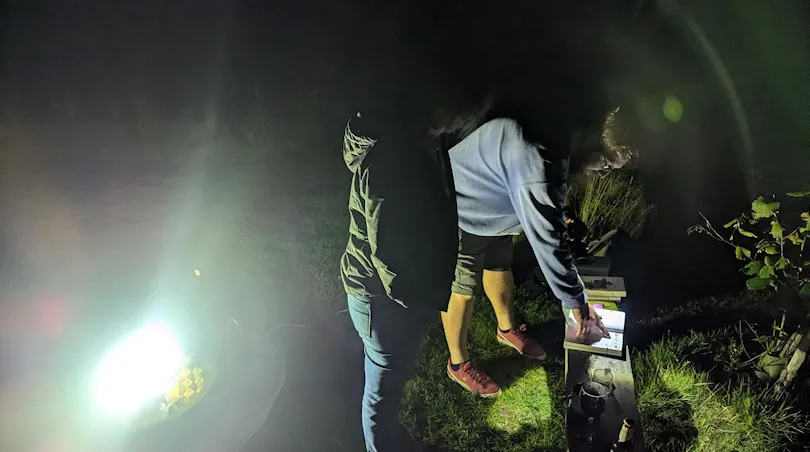
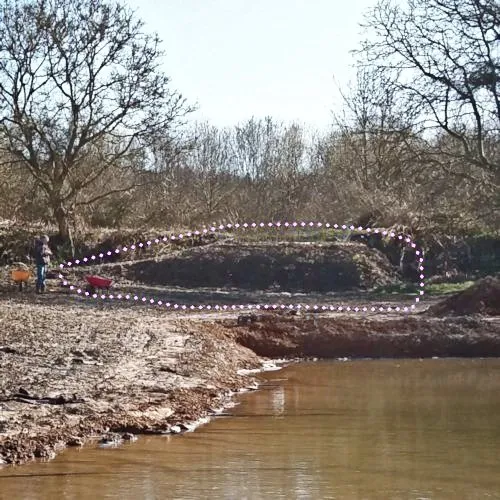
Moth Trapping at Langdon Court 2024
ID Books: Sources of Useful Information for Identification
- Useful books include those illustrated by Richard Lewington. Illustrations include the variations in hue shown by many species.
- Sometimes a photographic guide and illustrated guide are useful for comparisons.
- Field Guide to the Moths of Great Britain and Ireland | NHBS Field Guides & Natural History.
- The 'What's Flying Tonight?' App, described in the first section of this web page, has been used by KLAW members.
Examples of Larval Foodplants
- Foxgloves are food plants for several moths, including the lesser yellow underwing (Noctua comes), angle shades moth (Phlogophora meticulosa) and setaceous Hebrew character (Xestia c-nigrum), and great for bumblebees.
- Lady's bedstraw (Galium verum) a native perennial wildflower which produces frothy heads of tiny yellow flowers, making a colourful addition to areas of long grass in summer, while providing food for the hummingbird hawk-moth (Macroglossum stellatarum), elephant hawk- moth (Deilephila elpenor) and bedstraw hawk-moth (Hyles gallii).
- Mullein, irresistible to the brightly striped caterpillars of the mullein moth (Cucullia verbasci). Drought-resistant, statuesque biennials producing tall spires of yellow flowers that are perfect for punctuating prairie planting or a dry garden, as well as adding colour to wildlife areas.
- Mint, a great all-rounder, caters for caterpillars of the mint moth and beautiful plume moth, as well as producing flowers that are loved by bees
- Hedges, a mixed native hedge, provides for a huge range of insects, mammals and birds. Include species such as hawthorn (Crataegus monogyna), blackthorn (Prunus spinosa), hazel (Coryllus avellana) and dog rose (Rosa canina), each of which are food plants for several different moth caterpillars. Where there is enough space, larger native trees such as oak, birch and willow all provide for several moth species.
Day-flying Moth Favourites
- Day-flying moth favourites: Red valerian and Lavender
- Night-time nectar providers: Argentinian vervain, Tobacco plant, Nicotiana, Common jasmine, Evening primrose, Oenothera, Globe artichoke, Hebe, Honeysuckle, White campion, Silene latifolia, Sweet rocket
- Foodplants for moth caterpillars: Foxglove, Currants
- Hedge favourites such as Blackthorn, hawthorn, hazel, holly, Mullein, Lady's bedstraw, Hop, Ivy, Stinging nettle
- Trees such as Willow, Oak